Installing frameless cabinets yourself can be a cost-effective way to upgrade your kitchen. Homeowners love these cabinets because they maximize storage space and have a clean, contemporary look. Unlike face-frame cabinets, there is no center piece, which extends the interior and makes everything easier to access. It’s also easier to make minor adjustments to the drawer slides or doors if the cabinet gets out of plumb over time.
This article will explain how to install frameless cabinets yourself, including helpful suggestions to avoid common problems like failing to ensure the doors sit flush. With the right hardware and a little know-how, your kitchen will look better than ever.
Old Cabinet Removal & Paint Tips
- Remove Old Cabinets: Of course, you’ll want to remove your old cabinets. Be sure to thoroughly clean off any dust or debris that the cabinets may have hidden. This lets you freshen everything up with new paint and flooring before the new cabinets are mounted.
- Paint Before Cabinets: This prevents paint from getting on your cabinets and ensures you can access the entire space, avoiding common issues like old paint left behind cabinets.
- Install Flooring: If you’re changing up the flooring, doing this first will give you a nice, even layer and prevent misalignment. Wait until all the glue is dry before you start the installation.
- Place Masking Tape on Cabinet Sides and Edges: This will keep the cabinets from scuffing up the paint or floors during the installation process, ensuring a neat and clean look.
- Turn Off Electricity to Outlets: Since you’re using power tools, you want to avoid electric shock or damaging your outlets. Turn off the power supply, then cover any exposed outlets.
New Cabinet Inspection
Always double-check your shipment against the order to ensure you have everything before you start the installation. Your cabinet manufacturer will have sent an order slip along with the cabinets, or you can check online.
Once you have ensured you received everything, inspect each piece to check for damage, like scuffs or cracks in the wood. If anything is missing or damaged, inform the manufacturer right away.
This helps you avoid annoyances like running out to the hardware store during your installation for a missing screw or discovering you are missing one of the end panels halfway through the project. You can get right to work installing cabinets with no interruptions.
Kitchen Wall Inspection & Measurements
For this step, you will need a stud finder, a pencil, and a level tool.
- Check the Walls for Plumb Levels: DIYers often assume that their walls are perfectly level, but even a quarter-inch difference can make your cabinets droop. Using a level, ensure everything is even. If certain parts of the wall are not plumb, you may need filler to ensure that all the cabinets hang properly.
- Ensure the Floor is Even: Like with the walls, you may need shims if the surface is not perfectly level. Use your level and mark any inconsistencies. Use your level to check the high points of the floor, then identify where you may need filler pieces to close any gaps for a tight fit.
- Mark Trim: Door or wall trim may need to be removed so you have room for your frameless cabinets. Ensure that you do not measure over the trim, but around it.
- Identify Studs: The wall studs are used to hang heavy items, like a cabinet box. Use the stud finder to find the studs and mark them with your pencil. You will then mount the cabinet box to these studs once everything is laid out.
- Measure 34.5 Inches from the Floor: Base cabinets are typically 34 ½ inches tall. With the average height of a countertop, this brings the workspace to a comfortable height. You’ll then align all your cabinets at the correct height before mounting each unit.
Mapping Out Your Kitchen
Precision and double-checking your measurements prevent you from having to redo drafts, like pulling out the first cabinet because it’s too close to the stove.
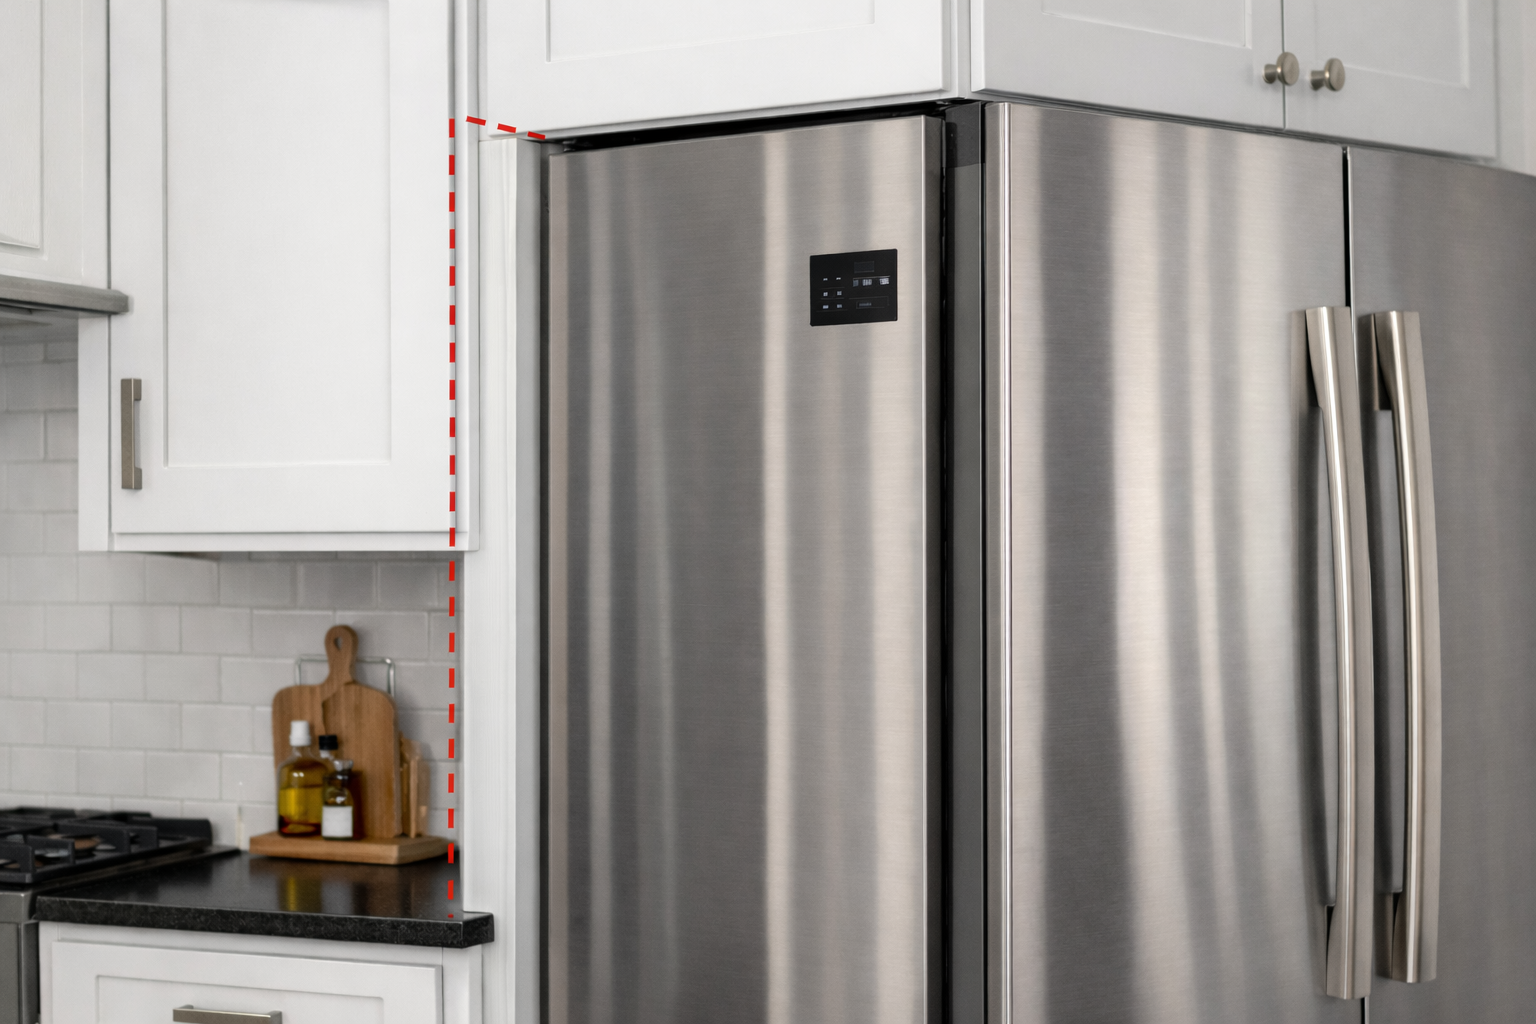
Outline where your appliances are before you begin marking your cabinets. You will only need a small gap between each appliance and its adjacent cabinet: just enough to prevent binding and allow for material expansion.
Generally, this is about 1/4 inch on each side of the appliance. In other words, if you have a standard 24-inch dishwasher, you’ll need a 24 ½ space.
Use a pencil to make outlines for each appliance with the requisite half-inch extra space. Then, mark a line 34 ½ inches from the floor before adding the outlines for each cabinet. You’ll start with the corner cabinets before moving to the middle ones throughout the room. Be sure to note any trim that may interfere with your cabinets.
Installing the Lower Corner Cabinets
Starting here ensures that everything is even and you have a nice fit between all the cabinets.
- Gather Your Tools: You will need clamps to hold the cabinets in place, a level to ensure everything is square, and a drill to mount them.
- Set the Cabinet Box in Place: Remove the doors, as you only need to mount the cabinet box. You can mount doors once the box is in place.
- Ensure the Cabinets are Level With Your Marks: If they are not level, then you can install cabinet shims. This filler material keeps all the cabinets aligned if one part of the floor is a little lower than the rest. Measure the shim and cut it to the correct height, then slide it under or behind the cabinet.
- Mark Stud Locations on the Back: You have already marked the studs, and now you need to align them with the same location on the cabinet box. Place small marks where your screws will go.
- Drill the Holes: Using your power drill, screw the cabinet into the studs.
- Check That Everything is Level: Place a level in the front of the cabinet to ensure it is properly aligned.
Connecting Your Lower Cabinets
Once the first cabinet is secured, you will move on to the one beside it. Set it beside the first cabinet, making adjustments and placing shims as necessary. You can use clamps to bring the cabinets closer together without having to hold them in place.
Turn off the power to the area if you are drilling near outlets, as this will prevent electrocution.
Next, drill evenly spaced holes in the side of the cabinet faces. Check the manufacturer’s instructions for guidance on how many screws you will need to secure these together, such as this guide by Cabinet Corp.
Install screws and check that everything is level once more. Repeat this same procedure for all lower cabinets.
Hanging Wall Cabinets
Generally, it’s better to install upper cabinets after the lowers. This allows you to set the uppers on top of the lowers during the installation process, and it also ensures more accurate alignment. You are less likely to scratch or drop anything this way.
While the lowers are flat on the ground, you will need to do some heavy lifting to get the uppers into place. Don’t try to do the job alone: have a second person help you, or use a cabinet jack. Never stand directly underneath a cabinet you are mounting. Check if you will need a filler strip to keep everything flush and even.
Repeat the same procedure by starting with side cabinets before moving to the middle. Regularly check alignment with the lowers using a tape measure and level as you install each cabinet.
The Final Steps
Once all the cabinets and doors are in place, there are a few last steps until your kitchen is ready to entertain.
Crown Molding Installation
Crown molding gives a neat appearance, hiding any filler strip and adding visual appeal. Screw the support strip to the top of the cabinets, then cut the molding to the proper length. When it’s ready, attach it to the support strip with adhesive and nails.
Silicone-based adhesives are usually the best choice. While they will harden within 30 minutes to an hour, they require up to 48 hours to completely cure.
Attaching Doors and Finishing Touches
Once you’re done, mount the cabinet doors. If you’re using full overlay doors, be sure that you align them correctly with the face frame using a level. You’ll then mount the hardware, such as knobs and pulls, by drilling an opening for the screws and threading them through.
With this, you’ll have all the major components completed for your frameless cabinets:
- Measuring cabinet lengths
- Ensuring each cabinet is level
- Installing the base frameless cabinets
- Aligning upper cabinets with base
- Attaching molding
- Mounting cabinet doors
- Installing knobs or pulls
Install With Confidence!
Frameless cabinets are one of the best remodeling options for kitchens and other rooms due to their sleek, clean silhouette. Better yet, they are simple to install. You align the base and upper cabinets, drill them into the studs, and attach molding and cabinet doors. Before you know it, you’ll have a fully refreshed kitchen.Feel free to return to this post when you need a reminder, or contact us to learn more about our custom frameless cabinets. We have a large selection and impeccable customer service, so you’ll love your kitchen even more.

FAQs about Frameless Cabinets
Tools you will need include:
Drill
Stud finder
Level
Clamps
Measuring tape
Pencil
Mallet or hammer
Wood shims
You should install your lower frameless cabinets first. This gives you a sturdy base to place the upper kitchen cabinets on and reduces the risk of damaging the uppers while working.
To shim your cabinets, identify where the floor is lower, then place the shim under the base. Tap it gently into place and use a level to confirm that everything is now even. After securing the cabinets, use a utility knife to trim off excess material before installing the molding.
No, you should have a second person to help you lift the cabinets and ensure everything is even before drilling in the screws. This can prevent overexertion injuries.
Common mistakes include:
Failing to double-check measurements
Neglecting a layout plan
Not accurately measuring appliance spaces
Not inspecting the cabinets before installation
Failing to level cabinets
Not checking for the studs
By using this convenient guide, you can avoid these common errors and ensure a flawless installation.